Amish Butter Pecan Icebox Bars (No-Fuss, Make-Ahead & Impossible to Resist)
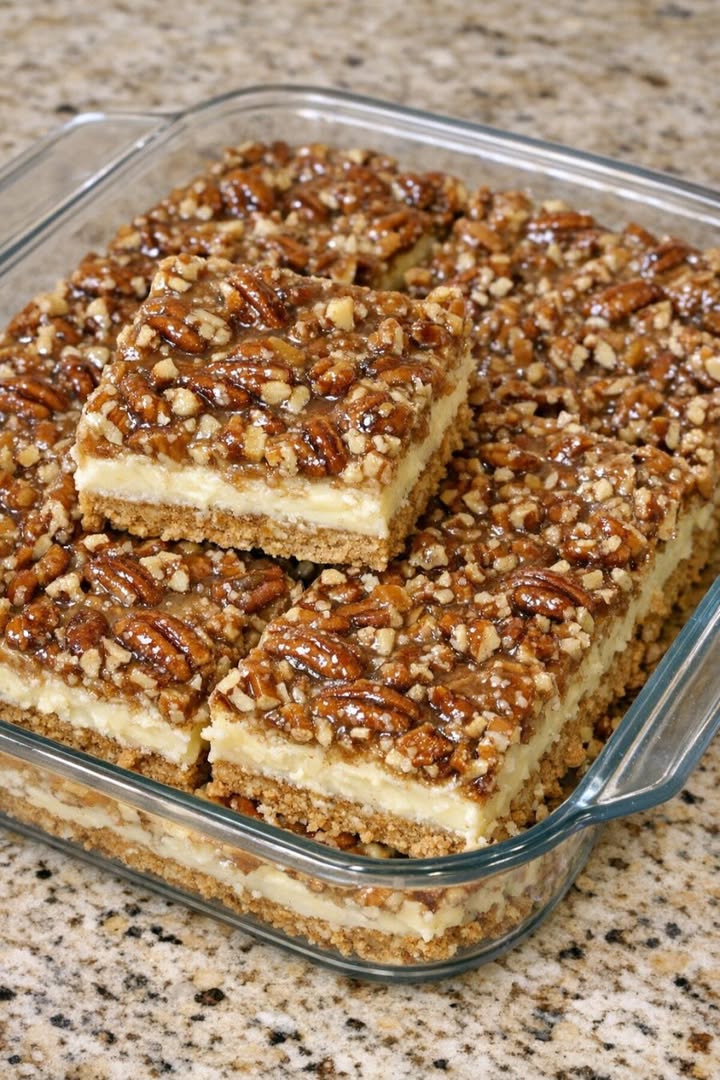
There is a particular kind of dessert that lives quietly in a glass casserole dish in the refrigerator, waiting for the moment someone wanders into the kitchen looking for just a little something sweet after dinner. Grandma Marlene kept a pan of these Amish butter pecan icebox bars tucked in the fridge at all times, and everyone in the family understood that was exactly what they were there for. A buttery, pressed graham cracker crust. A glossy, golden layer of sweetened condensed milk and toasted pecans. Baked briefly, cooled completely, then refrigerated until firm and sliced into the kind of neat, beautiful squares that look like they came from a bakery case and taste even better than that.
This is the dessert with that classic church-basement, Midwestern potluck energy — simple pantry ingredients, very little hands-on time, and a result that quietly earns more compliments than anything that required twice the effort. Make them on a Tuesday night, slide the dish into the refrigerator, and know that dessert is handled for the rest of the week — or until someone finishes them, whichever comes first.
Why These Icebox Bars Belong in Every Home Baker’s Regular Rotation
- Make-ahead by design. These bars need at least 3 hours in the refrigerator to set — which means they are best made the night before, and they only get better as they chill. Perfect for entertaining, potlucks, and busy holiday weeks.
- Only one brief bake. Eighteen to twenty-two minutes in the oven, then everything finishes in the refrigerator. No monitoring, no timing anxiety, no standing at the stove.
- The sweetened condensed milk layer is extraordinary. Whisked with butter and vanilla, then folded with toasted pecans and baked until glossy and set, it produces a filling that sits somewhere between a pecan pie filling and a soft caramel — with far less work than either.
- Makes 16 generous bars from a single 9×13-inch pan — perfect for a crowd, a cookie exchange, or a week of after-dinner treats.
- Travels perfectly. Keep them in the glass casserole dish, chilled, and cut on-site. They arrive looking as beautiful as when they left.
- They keep for 5 days in the refrigerator. One batch covers the entire week, and the bars actually taste better on day two than day one.
Ingredients
Makes 16 bars
For the graham cracker crust:
- 2 cups graham cracker crumbs (about 14 full graham cracker sheets)
- ½ cup (1 stick) unsalted butter, melted
- ¼ cup granulated sugar
- ¼ teaspoon fine salt
For the butter pecan topping:
- 2 cups pecan halves or pieces, divided
- 1 (14-ounce) can sweetened condensed milk
- 3 tablespoons unsalted butter, melted
- 1 teaspoon vanilla extract
- ¼ teaspoon fine salt
On the pecans: Toasting the pecans before adding them to the filling is not optional — it is the step that makes these bars genuinely special. Raw pecans have a mild, somewhat flat flavor. Toasted pecans are aromatic, deeply nutty, and complex. The eight minutes in the oven is the single highest-return effort in this entire recipe.
On the butter for the topping: For an elevated version, brown the 3 tablespoons of butter in a small saucepan over medium heat until it smells nutty and toasted and the milk solids turn golden — about 3 to 4 minutes. Browned butter in the condensed milk filling adds a caramel depth that takes these bars to the next level with almost no extra work.
Step-by-Step Instructions
Step 1: Prepare the Dish
Lightly butter or spray a 9×13-inch glass casserole dish. Glass is the preferred vessel here — it conducts heat gently and evenly, shows off the layered bars beautifully, and goes straight from the oven to the refrigerator without issue. Preheat the oven to 350°F (175°C).
Step 2: Toast the Pecans
Spread the 2 cups of pecans in a single layer on a rimmed baking sheet and toast in the preheated oven for 6 to 8 minutes, until fragrant and lightly darkened. Watch them carefully — pecans go from perfectly toasted to burnt in under a minute. Remove from the oven and allow them to cool for a few minutes, then roughly chop them, keeping some pieces larger for a rustic, pecan-studded appearance. Set aside ½ cup of the chopped pecans for sprinkling over the top.
Step 3: Make and Press the Crust
In a medium bowl, stir together the graham cracker crumbs, ½ cup melted butter, granulated sugar, and salt until the mixture resembles damp sand and holds together when pressed between your fingers. Transfer the mixture to the prepared glass dish and press it firmly and evenly across the entire bottom using the flat bottom of a measuring cup or a smooth glass. Pressing the crust firmly is essential — a well-packed crust holds together when cut and does not crumble apart under the weight of the filling.
Step 4: Make the Butter Pecan Filling
In a medium bowl, whisk together the sweetened condensed milk, 3 tablespoons melted butter (or browned butter for an elevated version), vanilla extract, and salt until completely smooth and glossy. Fold in 1½ cups of the chopped toasted pecans until evenly distributed throughout the filling.
Step 5: Assemble the Bars
Pour the butter pecan filling evenly over the pressed graham cracker crust, using a spatula to spread it all the way to the edges of the dish so every bar in the pan gets a complete, even layer of filling. Sprinkle the reserved ½ cup of chopped toasted pecans evenly over the surface and press them very gently into the top — just enough so they adhere without sinking completely into the filling.
Step 6: Bake
Bake at 350°F for 18 to 22 minutes, until the edges of the filling are just beginning to bubble and the center looks set but still carries a very slight jiggle when you gently nudge the pan. The surface should look shiny and golden, with the pecans on top lightly toasted. Do not overbake — the filling continues to set significantly as it cools and chills, and bars pulled at the right moment will be far more tender and glossy than ones left in too long.
Step 7: Cool Completely
Remove the pan from the oven and allow it to cool completely on a wire rack at room temperature before covering or refrigerating. Covering a warm pan traps steam that can make the surface tacky and interfere with the clean, glossy finish. Full cooling also helps the layers settle and bind together so the bars cut cleanly without sliding apart.
Step 8: Refrigerate Until Firm
Once fully cooled, cover the glass casserole dish tightly with plastic wrap or a fitted lid and refrigerate for at least 3 hours — or overnight for the best possible results. The refrigerator is where the transformation happens: the filling firms from glossy and soft to the clean-cutting, tender-dense texture that defines a classic icebox bar.
Step 9: Slice and Serve
When ready to serve, remove the pan from the refrigerator and let it sit at room temperature for 5 to 10 minutes to soften very slightly. Run a sharp knife under hot water, wipe dry, and cut the bars into 16 squares using firm, downward strokes. Wipe the knife clean between each cut for the neatest, most bakery-worthy edges. Serve cold, directly from the dish.
Pro Tips for Perfect Butter Pecan Icebox Bars
- Toast the pecans — every single time. This step is the most impactful minute-for-minute effort in the entire recipe. The difference between raw pecans and properly toasted pecans in the finished bar is the difference between a good dessert and one that earns genuine praise. Set a timer and watch them closely — they brown quickly.
- Press the crust very firmly. The crust needs to be dense and compact enough to support the weight of the filling without crumbling apart when cut and served. Use the flat bottom of a measuring cup and apply real pressure across the entire surface, working especially into the corners.
- Do not overbake. The sweetened condensed milk filling continues to firm up significantly as it cools at room temperature and then again in the refrigerator. Bars pulled when the center still jiggles slightly will be perfectly set after chilling. Bars left in until the center is fully firm will be dry and dense after refrigerating.
- Cool fully before refrigerating. Patience here produces a better result. A pan that is still warm when covered will trap steam against the surface, potentially making the top tacky. A fully room-temperature pan refrigerates into a clean, glossy, perfectly textured bar.
- Wipe the knife between every cut. The filling is sticky and it transfers to the knife blade. A sticky blade drags through subsequent cuts, producing ragged edges rather than clean lines. A hot, wiped knife glides through the chilled filling like butter — because it essentially is.
- Make them the day before. These bars are genuinely better on day two. The crust softens very slightly and melds with the filling, the flavors deepen, and the bars cut with even more precision. If you have the time to plan ahead by 24 hours, the result will be noticeably superior.
Serving Suggestions
- Straight from the fridge, cold. This is the authentic icebox bar experience — firm, clean-edged squares with that classic chilled-dessert texture that is deeply nostalgic and satisfying.
- With hot coffee or tea — The slight bitterness of a good cup of coffee or a fragrant tea is the ideal complement to the sweet, buttery, nutty filling. The temperature contrast between the hot drink and the cold bar is particularly wonderful.
- With a dollop of lightly sweetened whipped cream — A small cloud of whipped cream and a few extra chopped pecans scattered on top turns a simple refrigerator square into a plated dessert worth photographing.
- Alongside fresh berries — A bowl of fresh raspberries or sliced strawberries next to the bars adds bright color, tartness, and freshness that balances the richness of the butter pecan filling beautifully.
- Cold milk for the kids — The classic accompaniment. Sweet, buttery icebox bars and a glass of cold milk is a combination that has delighted children for generations.
- At a potluck or holiday gathering: Keep the bars in the glass casserole dish, refrigerated until the last possible moment, and cut them on-site. They arrive looking perfect and hold their shape beautifully at room temperature for up to 2 hours.
Easy Variations to Try
- Brown butter version: Brown the 3 tablespoons of butter for the filling before mixing it with the condensed milk. The nutty, caramelized notes of browned butter add a depth of flavor that makes these bars taste considerably more complex and intentional. This single swap is highly recommended.
- Chocolate swirl: Sprinkle ½ cup of mini chocolate chips over the hot bars immediately when they come out of the oven, allow them to melt for 2 minutes, then use a toothpick or knife to swirl gently through the top without fully mixing. The marbled chocolate-pecan surface is visually stunning and adds a complementary richness.
- Mixed nuts: Substitute half the pecans with roughly chopped walnuts, almonds, or macadamia nuts. Each combination produces a different flavor and texture, and all of them work beautifully with the sweetened condensed milk filling.
- Thicker bars: Press the crust into an 8×11-inch dish instead of 9×13 for a significantly thicker bar with a more substantial crust-to-filling ratio. Add 5 to 8 minutes to the bake time and watch for the edges to bubble before pulling.
- Less sweet version: Use a scant 1¼ cups of sweetened condensed milk instead of the full can and loosen the filling with a tablespoon of heavy cream. The flavor is still rich and delicious but noticeably less intensely sweet — a good option for serving to adults who prefer a more restrained dessert.
- Coconut pecan variation: Fold ½ cup of toasted shredded coconut into the condensed milk filling along with the pecans for a gently tropical note that pairs beautifully with the butter and vanilla.
Storing These Bars
Cover the glass casserole dish tightly with plastic wrap or a snug lid and refrigerate for up to 5 days. The bars actually improve over the first 48 hours as the crust softens slightly and the filling continues to set and develop flavor — if you can resist eating them immediately, day two is genuinely the peak. For longer storage, cut the bars into individual squares, wrap each one in plastic wrap, and freeze in a zip-top bag for up to 2 months. Thaw individual bars in the refrigerator for a few hours before serving — they defrost beautifully and retain their texture.
The Bottom Line
These Amish butter pecan icebox bars are the kind of recipe that earns their place in a recipe box and stays there for decades — quietly reliable, deeply delicious, and always exactly right for the moment. A buttery graham cracker crust pressed firm. A glossy, caramelized pecan filling made with sweetened condensed milk and toasted nuts. A brief bake, a long, cold rest in the refrigerator, and then sixteen perfect squares that taste like they came from a church basement in the best possible way.
They are the dessert that waits patiently for whoever needs something sweet. The bars that get cut one square at a time over the course of an entire week. The recipe that someone always pulls you aside to ask about quietly before the gathering is over.
Make a pan. Slide it into the fridge. Tell no one — or tell everyone. Either way, they will be gone faster than you expect.
One pan. One brief bake. One refrigerator overnight. The bar dessert that earns a standing request every single time you make it.