Salted Caramel Crackle: The Sweet, Salty, Shatteringly Crispy Snack Nobody Can Stop Eating
There is a moment — usually about thirty seconds after you set a bowl of this out — when you realize you should have made a double batch. Salted Caramel Crackle is one of those dangerously addictive snacks that disappears at a rate completely disproportionate to how easy it was to make. Crispy cereal coated in a rich, buttery homemade caramel glaze, kissed with cinnamon and finished with just enough salt to make every sweet bite absolutely irresistible — this is the kind of treat that clears a party table in minutes and earns you recipe requests for weeks.
Ready in under 30 minutes. Made entirely from pantry staples. Requiring zero candy thermometers, zero complicated techniques, and zero baking experience. If you have been searching for the perfect homemade snack for the holidays, game day, movie night, or just because — your search is officially over.
Why This Recipe Is Completely Irresistible
The genius of this crackle comes down to one fundamental truth about flavor: sweet on its own is pleasant, but sweet and salty together is genuinely addictive. The generous measure of kosher salt in this recipe does not make it taste salty — it sharpens and amplifies every note of the buttery caramel, creating a contrast that keeps your brain asking for another piece before you have even finished the one in your hand.
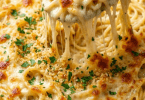
Then there is the texture. By combining two distinct cereals — the latticed, substantial squares of Rice Chex and the light, airy snap of Rice Krispies — you get a crunch that is layered and multidimensional rather than one-note. The Chex pieces trap pockets of caramel in their open structure, creating heavy, deeply glazed clusters. The Krispies fill every gap, ensuring no surface goes uncoated. The result is a snack where every single bite has the ideal ratio of crunch, caramel, and crackle.
And the brief bake in the oven is what sets it all apart from other cereal snack recipes. That 7 to 9 minutes of heat transforms the sticky caramel coating from a wet glaze into a hard, shatteringly crisp shell that locks onto the cereal permanently. No microwave shortcut produces this result. The oven step is the secret.
Ingredients
- 4 cups Rice Chex cereal
- 2 cups Rice Krispies cereal
- 1 cup unsalted butter
- 1 cup light brown sugar, packed
- 2 teaspoons pure vanilla extract
- 1 teaspoon ground cinnamon
- 1½ teaspoons kosher salt or coarse sea salt
Step-by-Step Instructions
Step 1: Preheat and Prepare
Preheat your oven to 350°F (175°C) and line a large, rimmed baking sheet with parchment paper. Do not use wax paper — it cannot withstand the oven temperature and will melt into the crackle. Parchment is non-negotiable here. Having everything set up and ready before the caramel comes off the stove is important, because once that caramel is poured, you need to move quickly.
Step 2: Combine the Cereals
In your largest mixing bowl, gently toss together the 4 cups of Rice Chex and 2 cups of Rice Krispies until they are evenly mixed. Set the bowl aside within easy reach of the stove. You want it close and ready the moment the caramel is done.
Step 3: Melt the Butter
In a medium, heavy-bottomed saucepan, melt the butter over medium heat. The heavy-bottomed pan is important — it distributes heat evenly and eliminates hot spots that can scorch the sugar before it has a chance to caramelize properly. Thin or lightweight pans are a common cause of burnt, bitter caramel.
Step 4: Build the Caramel
Once the butter is completely melted, add the packed brown sugar, vanilla extract, ground cinnamon, and salt. Stir gently but consistently until the sugar begins to dissolve into the butter and the mixture looks smooth and unified. The molasses in the brown sugar is what gives this caramel its deep, complex flavor — do not substitute white sugar here.
Step 5: The Critical Boil
Bring the mixture to a full, rolling boil while stirring continuously — do not walk away from the pan at this point. Once it reaches a rolling boil, keep stirring and cook for exactly 2 to 3 minutes. Watch closely: as the water evaporates out of the mixture, the caramel will visibly thicken and turn slightly lighter in color. This is your visual confirmation that the sugar has reached the correct temperature to set hard and crispy once baked. Under-boiling is the single most common reason crackle turns out chewy instead of crunchy — so time it carefully.
Step 6: Coat the Cereal
Remove the saucepan from the heat immediately and pour the hot caramel directly over the bowl of mixed cereal. Working quickly with a silicone spatula, fold and toss the mixture from the bottom up, turning everything over repeatedly until every single piece of cereal is thoroughly coated in the glossy caramel. Speed matters here — the caramel begins to set as it cools, so the faster you work, the more evenly everything gets coated.
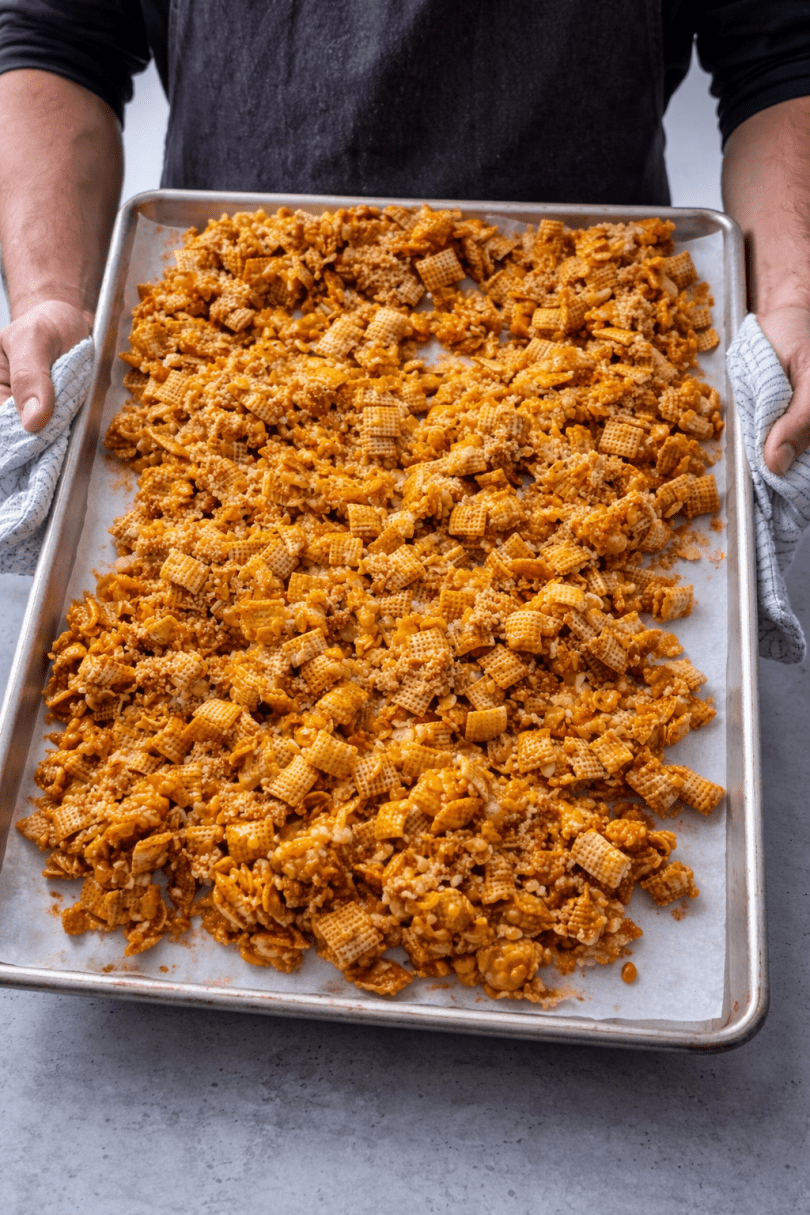
Step 7: Spread and Bake
Spread the caramel-coated cereal in a single, even layer across the prepared parchment-lined baking sheet. Try to avoid large clumps — a flatter, more even spread produces more consistently crunchy pieces with better caramel coverage. Bake on the center rack for 7 to 9 minutes. You are not trying to brown the cereal — you are setting the caramel coating so it hardens into a crisp, snappy shell.
Step 8: Cool Completely Before Breaking
Remove the pan from the oven and set it on a wire rack or a heat-safe surface. Now comes the hardest part: do not touch it. Allow the crackle to cool completely and fully harden before breaking it apart — this typically takes 20 to 30 minutes. Breaking it too early results in a sticky, messy situation rather than the clean, defined clusters you are after. Once it is completely cool and firm to the touch, break it into bite-sized pieces and transfer to an airtight container.
Key Ingredient Notes
Rice Chex: The structural backbone of the crackle. The open lattice shape of each square acts like a vessel, trapping caramel within its pockets and creating those heavily glazed, deeply satisfying bites. Do not substitute other Chex varieties — wheat or corn Chex change the flavor profile significantly and behave differently in the oven.
Rice Krispies: The textural counterpart. Lighter and airier than Chex, the Krispies fill every gap in the mixture and ensure total caramel coverage across every surface. They also add a distinct, lighter snap that contrasts beautifully with the heartier Chex crunch.
Unsalted Butter: Using unsalted butter gives you complete control over the salt level, which matters enormously in a recipe where salt is a primary flavor component. If you only have salted butter on hand, reduce the added salt by at least half a teaspoon and taste the caramel before pouring.
Light Brown Sugar: The natural molasses content in brown sugar is what produces the deep, complex, almost toffee-like flavor of the caramel coating. It also contributes to the chewy-yet-crisp texture of the set glaze. Do not substitute white granulated sugar — it lacks the molasses and produces a noticeably flatter, less interesting caramel.
Kosher Salt or Coarse Sea Salt: This is not a background ingredient — it is one of the two lead flavors in the entire recipe. Kosher salt and coarse sea salt both have a clean, sharp flavor that cuts through the sweetness decisively without leaving a harsh aftertaste. Fine table salt is too aggressive and dissolves too completely — stick with a coarser grind for the best result.
Pro Tips for a Flawless Crackle
- Time the boil precisely. Two to three minutes of rolling boil is the non-negotiable window for a crunchy result. Under-boil and the caramel won’t set hard; over-boil and it can turn bitter. Use a timer.
- Use a heavy-bottomed pan. Even heat distribution is what prevents the sugar from scorching on the bottom of the pan before it has properly caramelized. A cheap, thin pan is the most common cause of burnt or separated caramel.
- Work fast when coating. Caramel begins to set the moment it leaves the heat. Have your cereal bowl right next to the stove and move immediately from pan to bowl the second it comes off the burner.
- Spread it thin and even. A flat, even layer on the baking sheet means every piece gets equal oven exposure. Thick piles produce uneven results — some pieces crunchy, some still soft in the center.
- Be patient during cooling. The full 20 to 30 minutes of cooling time is what produces clean, crisp clusters. Break it too soon and you get sticky, shapeless pieces. Trust the wait.
- Store it right. Humidity is the enemy of crackle. Store in a completely airtight container at room temperature, away from heat and sunlight, and it will stay perfectly crisp for up to 7 days.
Delicious Variations to Try
- Nutty Crackle: Toss 1 cup of lightly toasted pecans, roasted peanuts, or sliced almonds into the cereal mixture before pouring over the caramel. The nuts add a savory, roasted depth that takes the whole thing to another level.
- Chocolate Drizzle: Once the crackle has cooled and hardened completely, melt ½ cup of semi-sweet dark chocolate chips and drizzle over the top. Let the chocolate set fully before breaking into clusters. The bitter edge of dark chocolate against the sweet caramel is absolutely outstanding.
- Holiday Spice: Add ¼ teaspoon of nutmeg and a pinch of allspice to the caramel along with the cinnamon for a warm, festive spice blend that makes this ideal for Thanksgiving and Christmas gatherings.
- Gluten-free: Both Rice Chex and Rice Krispies are naturally gluten-free, making this recipe a great option for guests with gluten sensitivities. Always verify the specific brand’s label for any cross-contamination warnings before serving to someone with celiac disease.
- Coconut Caramel: Stir ½ cup of toasted shredded coconut into the cereal mixture before coating for a tropical twist that pairs beautifully with the buttery caramel glaze.
Serving Suggestions
Salted Caramel Crackle is endlessly versatile. Here are some of the best ways to serve and present it:
- Party snack bowl: Pile it into a large serving bowl at the center of your snack table and watch it disappear. It holds its crunch for hours at room temperature, making it ideal for long gatherings.
- Holiday gift bags: Portion the crackle into clear cellophane bags tied with a ribbon for a beautiful, homemade edible gift that costs almost nothing to make and looks incredibly thoughtful.
- Dessert topping: Crumble a handful over vanilla ice cream, chocolate mousse, or a caramel pudding cup for an instant crunchy topping that elevates any simple dessert.
- Charcuterie and snack boards: Scatter clusters of crackle across a dessert board alongside chocolate truffles, fresh fruit, and salted nuts for a stunning, effortless presentation.
- Movie night snack: Serve in individual paper bags or small bowls alongside popcorn for a sweet-salty snack spread that beats any movie theater concession stand combination.
Storage Instructions
Store the fully cooled and broken Salted Caramel Crackle in a completely airtight container at room temperature. Keep it away from humidity, direct sunlight, and heat sources — all of which will soften the caramel coating and ruin the crunch. Stored correctly, it stays perfectly crisp and fresh for up to 7 days.
Freezing is not recommended for this recipe. The condensation that forms as the frozen crackle thaws will soften the caramel and turn the cereal soggy and stale. Make it fresh, store it properly, and enjoy it within the week — which, based on how quickly it tends to disappear, will not be a problem.
Troubleshooting Common Issues
My crackle turned out chewy instead of crunchy. This almost always means the caramel was not boiled for the full 2 to 3 minutes, or the baking time was too short. The rolling boil is what drives off enough water to allow the sugar to set hard. If this happens, spread the crackle back on the baking sheet and return it to a 350°F oven for an additional 5 minutes, then cool completely again.
My caramel separated and looks greasy. Caramel separation happens when the butter and sugar are heated too quickly or unevenly. Using a heavy-bottomed pan and maintaining a consistent medium heat — not high heat — with continuous stirring prevents the emulsion from breaking. If it separates, whisk vigorously off the heat and it may come back together.
My caramel tastes burnt. The sugar scorched, most likely due to a thin pan creating hot spots or the heat being too high. A heavy-bottomed saucepan and medium heat are essential. Once sugar scorches, the batch cannot be saved — start fresh.
The Bottom Line
Salted Caramel Crackle is the rare recipe that is simultaneously one of the easiest things you will ever make and one of the most crowd-pleasing things you will ever serve. Twenty-five minutes, seven pantry ingredients, one baking sheet — and the result is a gloriously crunchy, deeply flavored, sweet-and-salty snack that tastes like something from an artisan confectionery.
It is the treat that clears a table at every party. The gift that gets you called a brilliant cook by everyone who receives it. The midnight snack you make once and then find yourself making every week because the container never stays full for long. Once you understand the simple technique behind the caramel and respect the boil and the bake, this recipe is essentially foolproof — and the results are genuinely spectacular every single time.
Make a batch this week. Then make a double batch. Because the only real mistake you can make with this recipe is not making enough of it.